Ethernet Port Data Acquisition Card Installation Guide
2026-06-16 00:42:15
Preparing the Parts
1 Ethernet data acquisition card (The corresponding model for the DAS Ethernet port is: GY-DAQ-2480-E)
1 Ethernet cable supporting 1000M network transmission.
1 test computer
Device Connection
Use an Ethernet cable to connect the capture card to the Ethernet port on your computer.
Network Settings
Set the IP address for your PC
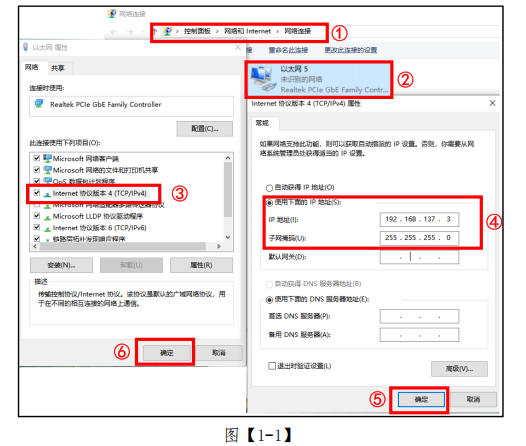
(1) On your PC, open "Control Panel" → "Network and Internet" → "Network Connections," as shown in Figure [1-1], Step 1.
(2) Locate the appropriate Ethernet connection based on your PC’s network interfaces, then right-click and select “Properties,” as shown in Figure [1-1], Step 2.
(3) Select “Internet Protocol Version 4 (TCP/IPv4),” as shown in Figure [1-1], Step 3.
(4) Set the "IP Address" to 192.168.137.3 and the "Subnet Mask" to 255.255.255.0, as shown in Figure [1-1], Step 4.
(5) Confirm the settings, as shown in Figure [1-1], steps 5 and 6.
Verify Network Connectivity
Use the ping command to verify that the computer and the data acquisition card are connected to the network.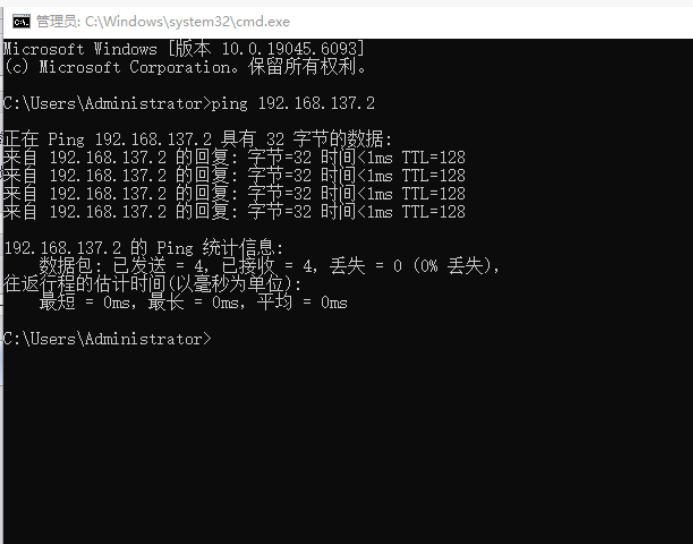
Open the Command Prompt on your computer. Then, type `ping 192.168.137.2`. If you receive a normal response (as shown in the image above), it means your computer is connected to the capture card.
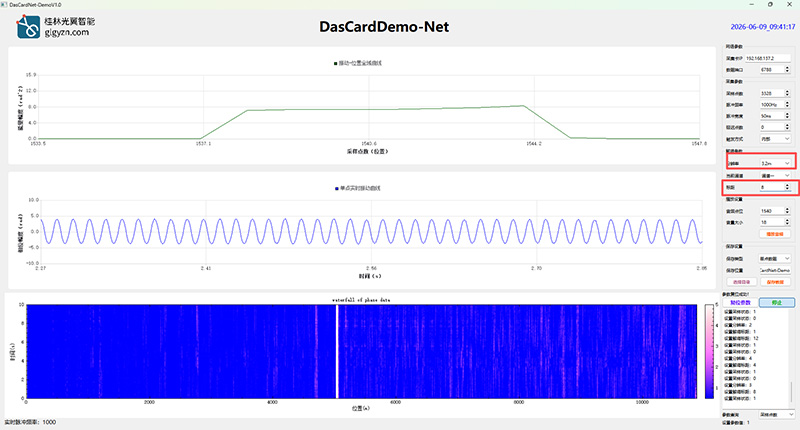
Open the DAS acquisition card software to run a test
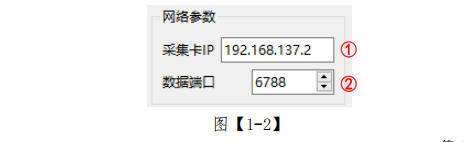
Open the DasCardNet-Demo software to configure the settings
(1) Set the "Acquisition Card IP" to 192.168.137.2, as shown in Figure [1-2], Step 1.
(2) Set the "Data Port" to 6788, as shown in Figure [1-2], Step 2.
Next, configure the capture card settings for testing.
Related Content
- Wiring Diagram for the Acquisition Card
- GY-DAQ-2480 Data Analysis and Sample Code for Capture Cards (Python)
- Data acquisition card for distributed fiber optic vibration monitoring system
- Ethernet Port Data Acquisition Card Installation Guide
- GY-DAQ-2510D API Documentation
- GY-DAQ-2480 Interface Documentation (1.41)
- Data Acquisition Card Product Selection Chart
- How to Connect the GY-DAQ-2480 to a DAS Module