Installation Guide for PCIe DAS Acquisition Cards
2026-06-16 00:32:08
The PCIe-based DAS data acquisition cards (GY-DAQ-2480 / GY-DAQ-2510D / GY-DAQA-2510) feature a PCIe x8 interface. Since PCIe x16 slots are compatible with PCIe x8, these data acquisition cards can be installed in either a PCIe x8 or PCIe x16 slot.
Determining whether a computer motherboard supports PCIe x8 or PCIe x16
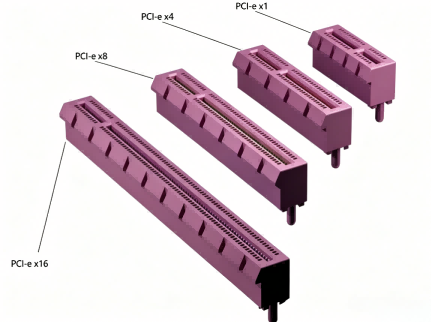
There are several types of PCIe slots; the differences between them can be seen in the image below.
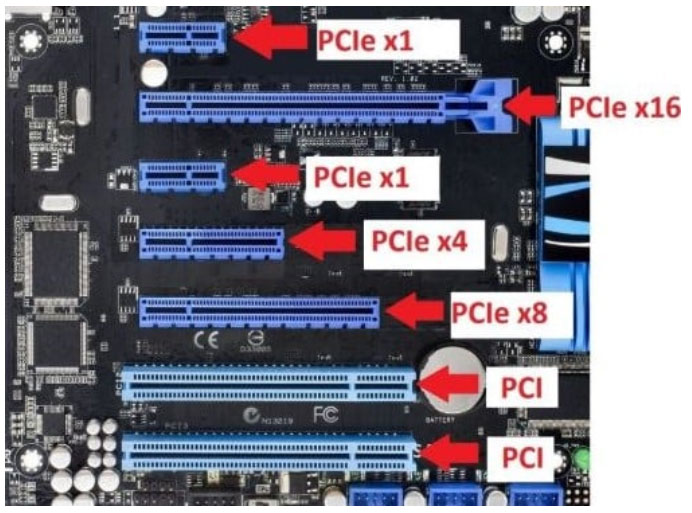
On your computer's motherboard, you'll see slots like the one shown below. Simply locate a PCIe x8 or PCIe x16 slot and plug it in.
DAS Acquisition Board Installation Instructions
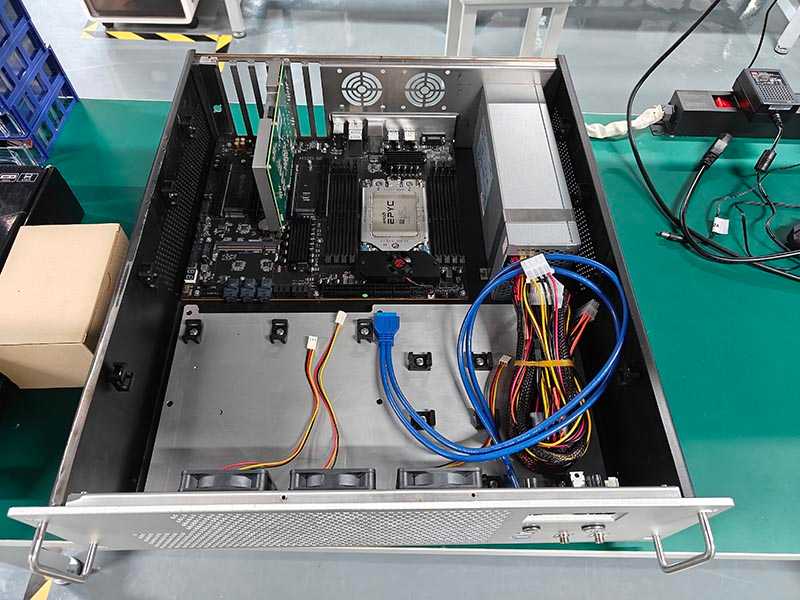
Open the computer case and insert the capture card into the PCIe x8 slot on the motherboard. See the image below.
Please note: Does your computer have an integrated display interface (VGA or HDMI)? If not, you will need to install a discrete graphics card to connect a monitor and use the computer. Since discrete graphics cards typically use a PCIe x8 interface, your motherboard must have two PCIe slots, or one PCIe x8 slot and one PCIe x16 slot, for this to work.
Driver Installation
Driver versions vary by card model. Please contact your sales representative or technical support to obtain the appropriate driver.
Verify that the driver has been installed successfully
Open the host computer application to see if it launches properly and if you can configure the parameters.
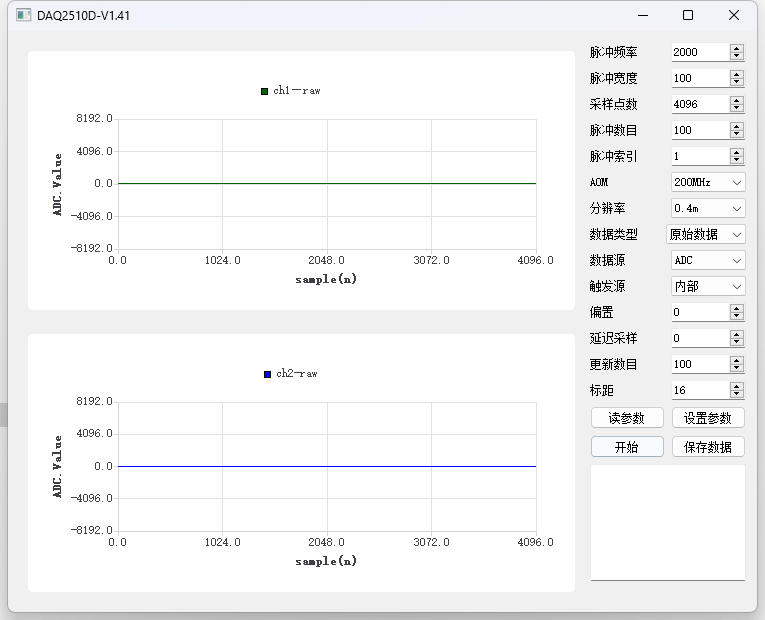
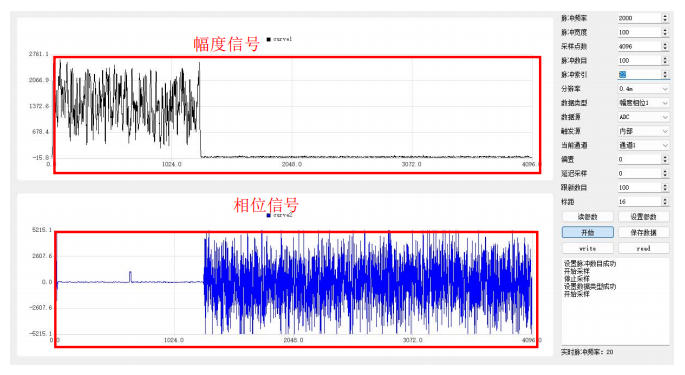
The host computer runs a GUI demo that demonstrates how to configure data acquisition card parameters, collect data, and display the resulting waveforms.
1. Running on Linux:
Open a terminal in the Demo directory and execute `sudo ./run.sh` to launch the software. After configuring the parameters, click “Start” to begin data acquisition. Do not change the parameters while data is being acquired; stop the acquisition before making any changes, and restart it after reconfiguring the parameters.
2. Running on Windows:
On Windows, simply double-click the .exe file to run the program.
DAS Acquisition Card Connected to a DAS Integrated Module
Once the acquisition card driver has been successfully installed, all that remains is to connect the DAS acquisition card to the DAS integrated module using an RF cable.
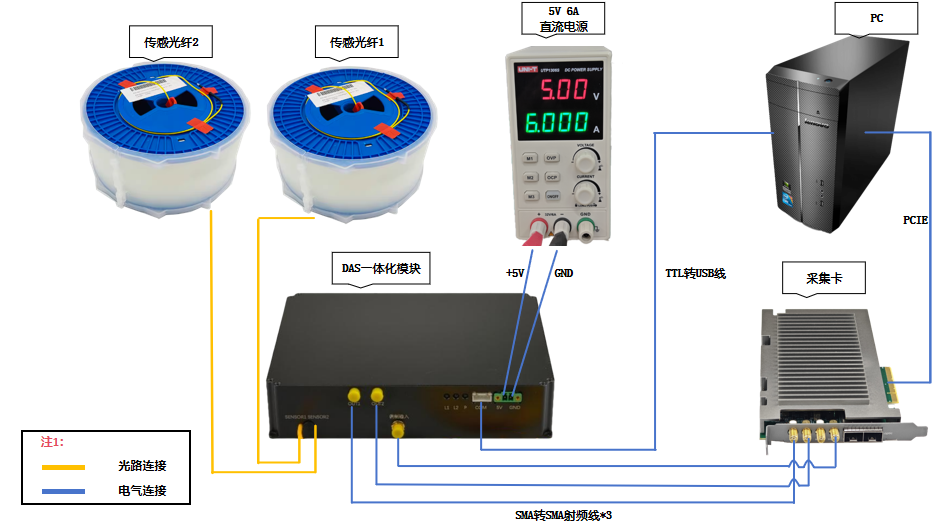
Since there are many models of DAS integrated modules, please carefully read the product manual included with the shipment to check the power supply requirements for the DAS integrated module you purchased (most currently operate on 12V) to avoid applying the wrong voltage and damaging the equipment.
Once the device cables are connected, connect the optical fiber. Use FC/APC connectors (green) for the fiber optic connections.
When everything is ready, power on the DAS integrated module, then launch the acquisition card test software to view the signal curves.
Related Content
- Data Acquisition Card Documentation Downloads
- Data Acquisition Card Product Selection Chart
- How to Connect the GY-DAQ-2480 to a DAS Module
- GY-DAQ-2480 Interface Documentation (1.41)
- GY-DAQA-2510 API Documentation
- Installation Guide for PCIe DAS Acquisition Cards
- Capture Card Testing Software
- Wiring Diagram for the Acquisition Card