DAS Data Acquisition Card Driver Installation Guide
2026-06-11 04:54:47
Driver Installation Guide
- Before installing the driver, insert the capture card into the PCIE slot (x8 or x16).
- Driver Installation on Windows
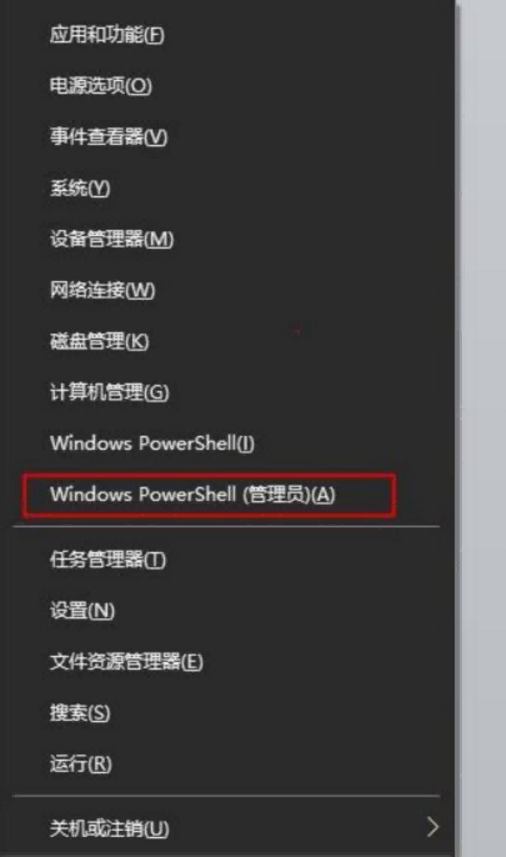
2.1 Enable Test Mode
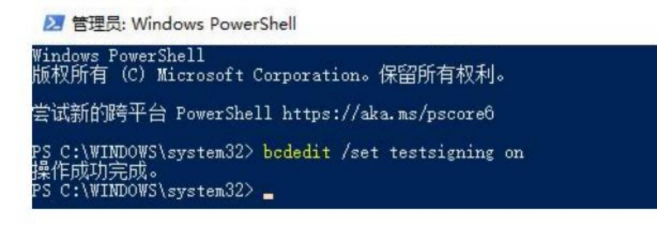
Open the terminal (must run as administrator) on Windows 7 / Windows 10, and enter the command:bcdedit /set testsigning onto enable test mode. Restart the system after configuration.
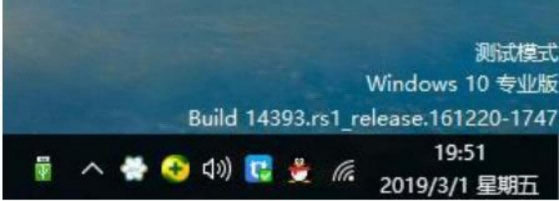
After successful operation, restart the computer. A prompt indicating the system has entered test mode will appear in the lower-right corner of the desktop.
Once the operation is complete, restart your computer. You will see a notification in the lower-right corner of the desktop indicating that the system has entered test mode.
2.2、Install the driver
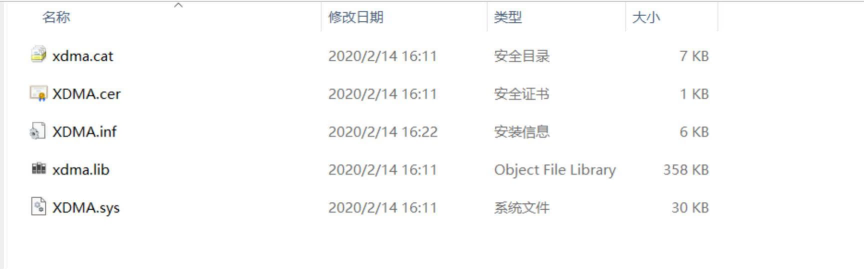
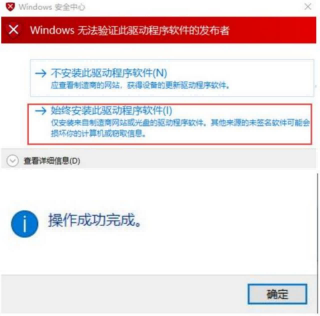
Right-click the xdma.cerfile shown in the image above, select“Install,” and install the certificate using the default settings. Then, right-click XDMA.inf and select“InstallDriver.
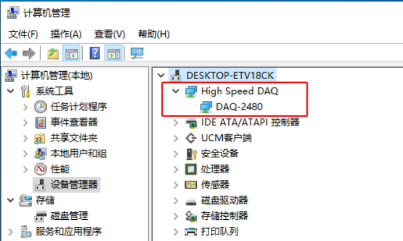
Once the driver is successfully installed, you will be able to see the DAQ-2480 device in Device Manager.
3. Installing the driver on Linux
3.1. Compiling the driver
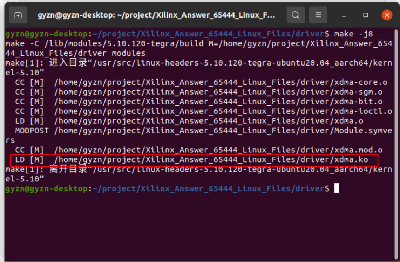
Open a terminal in the `Driver` folder and type `make` to compile the driver. Once compilation is complete, you will see that the `xdma.ko` file has been generated.
3.2. Driver Installation
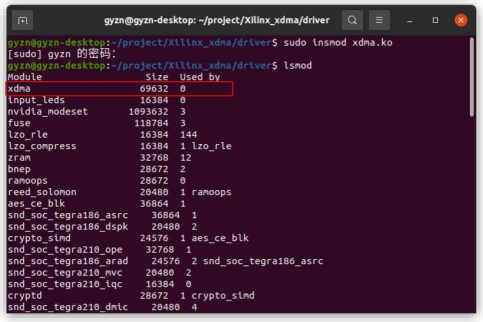
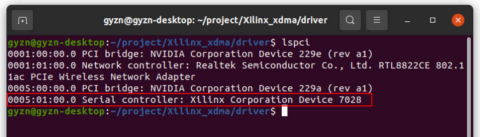
In the terminal, enter `sudo insmod xdma.ko` to install the driver. Once installed, you can use `lsmod` to view the driver, and `lspci` to view the capture card device.
Related Content
- DVS-ETH-100-2 API Documentation
- Data acquisition card for distributed fiber optic vibration monitoring system
- FAQ for the GY-DAQA-2510 High-Speed DAS Acquisition Card
- Wiring Diagram for the Acquisition Card
- Sample code for the DAS acquisition card (GY-DAQ-2480-E)
- Data Acquisition Card Product Selection Chart
- GY-DAQ-2480 Data Analysis and Sample Code for Capture Cards (Python)
- Ethernet Port Data Acquisition Card Installation Guide